
Welcome back to another tutorial !!! Let’s get started ! Grab your iPad or even sketch pad and pencil or stylish.
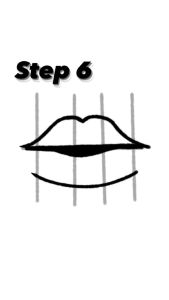
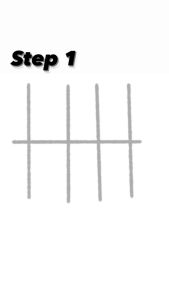
Step 1 : Draw a grid by 4 vertical lines and one horizontal line in the middle
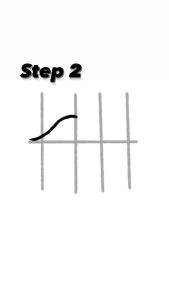
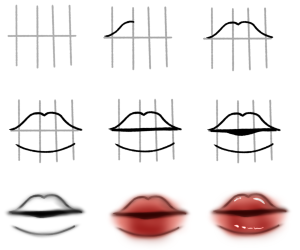
Step 2 : Draw a mountain / hill like line on the top left side
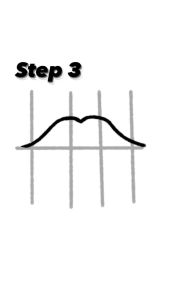
Step 3 : Do the same on the right side connecting the two hill lines in the middle
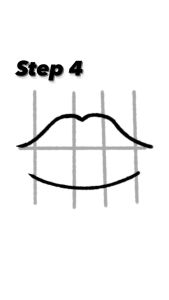
Step 4 : On the bottom of the grid draw an upside down rainbow line or wide “U”
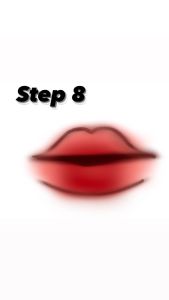
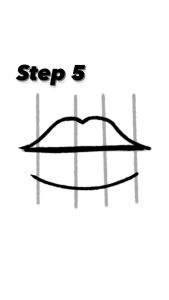
Step 7 : Darken the middle straight line
Step 8 : On the middle line draw a small dark hole ( note : this will be your gap opening of the lips and sometimes the teeth are shown in this gap )
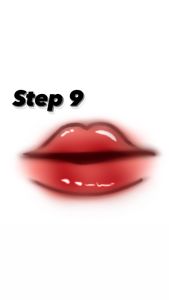
Step 9 : Erase the grid
Step 10 : With the blur or blending tool smudge the lips a little ( This will give is a glossy blur look )
Step 11 : Color your lips ( You can choose any color there are a variety of skin tones 🙂
Note : With the color you use remember to use a darker version of it on the bottom lip and the in the middle to make the lips more puffy. I also blended the edges of the color around the lips too a little !
Step 12 : Take a white and add your highlights on the lips ( you can put as many highlights as you want ) Hight lights on the lips can come in small circles or just lines.
If you’re using graphite on paper just use your eraser for highlights but dont erase too much of the lips off. If you’re using markers i suggest using a white gel pen .
Congrats you made lips !!!! If you did this tutorial make sure to tag me on instagram @zebraartist17 or comment below with a picture
I cant wait to see what you created !
Great tutorial, Z! Keep those artistic juices flowing!
Thank you so much ! 😀