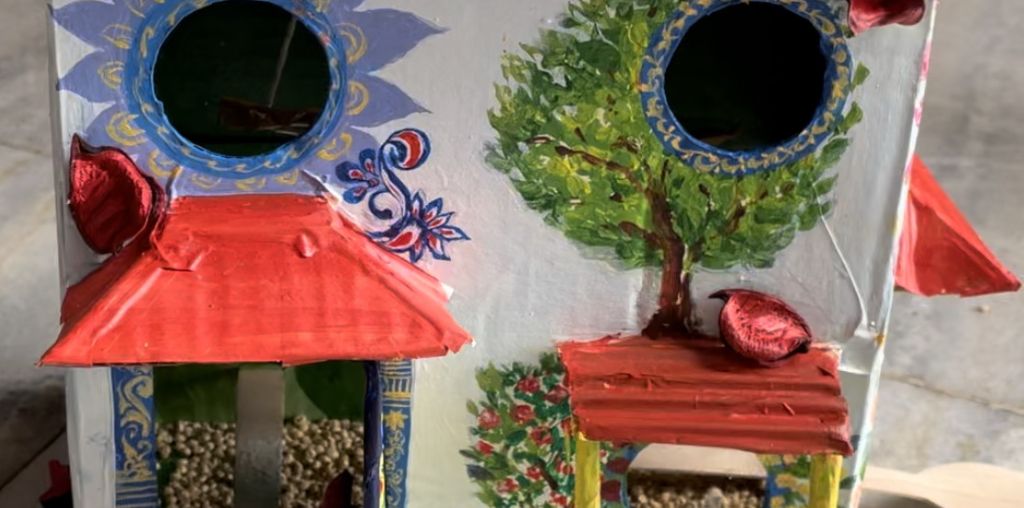
Creating a bird feeder can be a delightful and rewarding project that allows you to connect with nature while showcasing your creativity. Here, we will explore the process of making a self-made bird feeder using cardboard and enhancing it with beautiful floral designs. This budget-friendly and eco-friendly project will attract a variety of feathered friends to your garden, providing them with a reliable source of food.
Materials Needed:
- Cardboard box and thick cardboard sheets
- Scissors or craft knife
- cello tape
- wooden spoon or stick
- Pencil or marker
- Acrylic paints in various colors
- Gesso
- Paintbrushes
- Outdoor varnish or clear sealant
- Twine or string
- Birdseed
Step-by-Step Guide:
- Design the Bird Feeder:
- Start by selecting a cardboard box or cutting out a desired shape from thick cardboard sheets. A rectangular or square shape works well.
- With a pencil, draw the outlines of the feeder, including the base, sides, and a roof.
- Place the wooden spoon or stick below the bird feeder hole.
- Cut and Assemble the roof:
- Carefully cut a rectangle using scissors or a craft knife.
- Then cut two right angles from both the sides of the rectangle
- Inverse the right angles and attach on the sides of the centre portion using cello tape.
- Now, Stick the roof above the holes in the bird feeder using cello tape.
- Decorate with Floral Designs.
- Now comes the creative part! Paint the entire surface of the feeder with a Gesso as a base layer
- Paint beautiful patterns, flowers, roses and lavender plants; and cherry blossom trees.
- Optional Decoration:
- If desired, embellish your bird feeder with additional decorative materials like beads, ribbons, or artificial flowers. This step adds a charming touch to your creation.