There’s two ways i like to draw realistic hair one way is by using brushes i found on this site for procreate https://procreate.brushes.work and another way just using colors 😀 so let’s break it down step by step
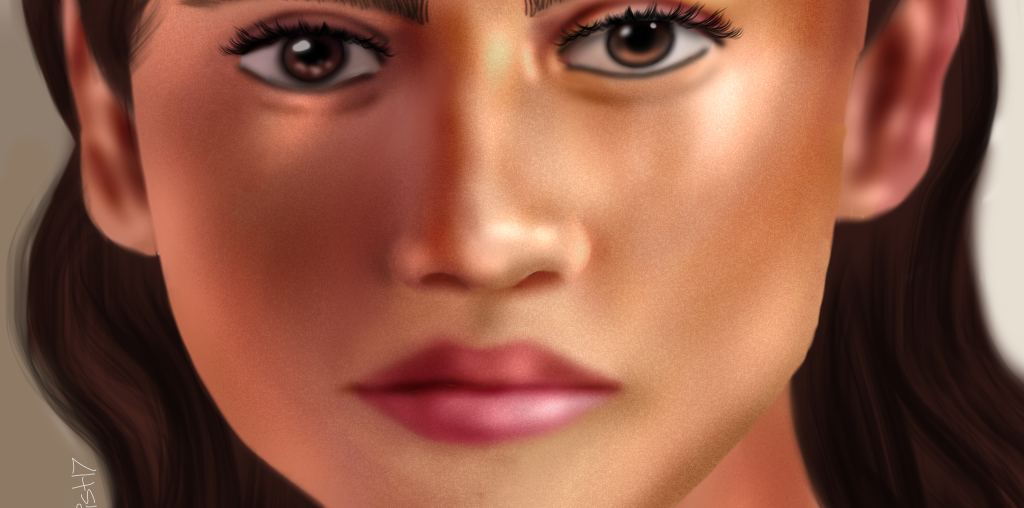
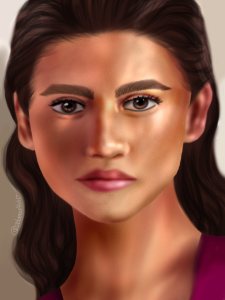
Making Realistic Hair Using Procreate Brushes ( See 1st ArtWork Of Zendaya For This Step by Step)
Step 1 : First Outline where i want the hair to go and which style you want it in.
Step 2 : Next lay down basic colors of the hair. For example of Zendaya’s hair in the first photo I used basic colors of burnt brown, light brown and dark brown.
Step 3 : After laying down all the basic colors, I blend the colors together lightly (not too much so i can still see some basic colors here and there).
Step 4 : Using hair brushes from https://procreate.brushes.work (p.s you can choice whatever hair brushes you like 😀 )( I mostly use Hyde’s Hair Set) I lay down the hair then lower the opacity to 40 or 50% determining on how it looks. You can see in the example artwork I did Zendaya’s hair strains can still be seen with light and dark strains. I also blend some strains to make it look natural. I usually put the highlights down where ever the light is coming from.
Thats how to make hair strains realistically using procreate brushes 🙂
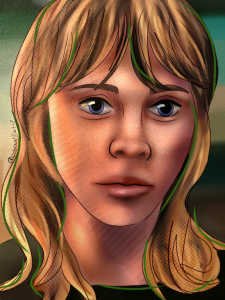
Making Realistic Hair Without Procreate Brush ( See 2nd Artwork of Sylvie for this step by step)
Step 1 : First outline where you want the hair to go and which style you want then lay down basic hair colors. For Sylvie’s hair in the second artwork I used a light brown, light yellow, and rusty brown.
Step 2 : Next blend the basic hair colors. Once you blended the colors take a darker color of the hair and create strokes do this with the lighter color too. I personally like use a pencil brush from the free Diyvinci.com set to create my strokes along with a smaller soft brush or just with any brush for your own comfort too will work.
Step 3 : Gently blend the strokes to where it’s still visible but nicely blended. Build on the basic hair coloring on a new layer with dark strokes( they can be wavy or straight lines). Don’t put too many because the darkness will overpower your basic hair colorings. ( also for me i used a pencil from the Diyvinci free brush pack to get the strokes )
Tip : Make sure your strokes are going in the direction of the hair. For example, if your character has curly hair the strokes are more of a swirl or if they have straight hair the strokes may have a slight curve in them to give it a flowy look.
Step 4 : Start a new layer Adding more strokes and lower the opacity on those strokes. This adds more volume to the hair and making it look fuller. Determining wear the light is on side of the hair may have more darker strokes than the other side. With my character i added bright green strokes to outline the hair for a cool effect 😆. I like to lower the opacity once I’m done laying the lighter and dark hair strokes. Sometimes I even add a glow and blend it in the hair. ( If you look at the hair in the first photo you can see how it’s smooth and in some areas and in the other you can still see the strands).
That’s how you make realistic hair strains 😀


This is incredibly helpful! Thanks for this!
Thank you so much 😊💕